How to: A Step-by-Step Guide on Installing Solar Lights Outdoors Yourself
Solar lights are an excellent addition to any home, providing convenient and eco-friendly lighting for pathways, gardens, or patios.
Adding solar lights may seem like too much work. However, with the right tools and know-how on the subject of how to install the lights, it can be a super easy yet affordable and fun project.
If you are clueless about how to install your pretty, dancing solar lights, then you will be happy to know that this step-by-step guide will help you install them yourself.
A step-by-step guide to installing solar lights.
Follow the steps below to get successful in your quest to install solar lights.
Step 1: Choose the Perfect Place to place Lights
Start by selecting the ideal location for your solar lights. Look for areas that receive ample sunlight throughout the day, as solar lights rely on sunlight to recharge their batteries. Consider pathways, garden beds, or areas requiring additional illumination at night.
Step 2: Gather all your Forces (Tools and Materials)
Before you begin the installation, gather all the necessary tools and materials. You will need solar lights, rechargeable batteries (if not included with the lights), a screwdriver, screws or stakes (usually included with the light), and a shovel or spade for digging (if you have decided to put it on the ground).
Step 3: Prepare the Place
If you have decided to decorate the ground with solar light, then you should take your shovel and start digging. The holes should be deep enough to keep the light securely in place. Ensure the holes are evenly spaced and aligned according to your desired lighting arrangement.
Step 4: Install the Solar Lights
Carefully insert the solar lights into the pre-digged holes, ensuring they are firmly in place.
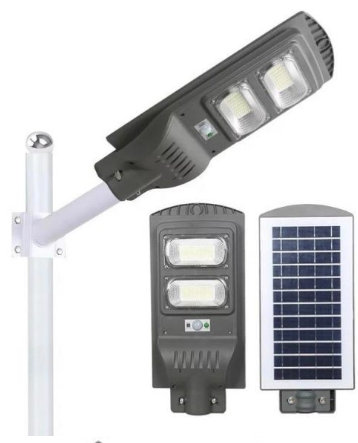
But, if your light comes with a screw or requires screws to secure them, use a screwdriver and drill machine to place it securely on a wall or a fence.
Step 5: Adjust its Settings (if needed)
Some solar lights come with adjustable settings, allowing you to control their brightness or illumination duration. Take a look at the manual’s guide to learn whether or not your light comes with alterable settings.
Step 6: Check your Lights
Before calling it a day, test the solar lights to ensure they are functioning properly. Put your hand or a cloth to cover the panel, which will simulate darkness, and the lights should automatically turn on; if they don’t, check the battery connections or consult the guide or the manufacturer.
Step 7: Maintain and Clean the Lights
It is essential to clean and maintain solar lights so regularly that they operate at their best. Periodically check the solar panels for dirt, debris, or blockade, and clean them with a soft cloth or sponge. Ensure the solar panels receive adequate sunlight by trimming any overhanging branches or shade.
Step 8: Enjoy Your Outdoor Solar Lighting
Congratulations! You have successfully installed your outdoor solar lights. Once you are done, it will be time to enjoy the sweet fruit of your hard work of installing the light. Enjoy the satisfaction of installing the light yourself and feel proud of contributing towards a greener and more energy-efficient outdoor lighting solution.
Additional Tips:
- If you live somewhere which has little sunlight, consider purchasing solar lights with higher-quality solar panels or additional features like larger battery capacity. Or put its solar panel in a sunny place.
- Regularly check the batteries in your solar lights and change them as needed to maintain optimal performance.
- Consider purchasing solar lights with motion sensors for added security and energy efficiency.
- Experiment with different lighting arrangements and positions to achieve your outdoor spaces’ desired ambiance and functionality.
Start Installing Solar Lights
Installing solar lights outdoors is a rewarding DIY project that can enhance the beauty and functionality of your outdoor spaces. Now that we have reached the end of this guide, you don’t need professionals’ help to install your lights. Instead, you can easily do it on your own.
All you have to do is follow the steps mentioned above and constantly take guidance from the instructions manual. And all will be set!

Leave a Reply